
The week before Christmas I had the amazing opportunity of having my youngest daughter with me for the WHOLE week. That hasn't happened in a LOOOONG time. She was on her break from school, and I was starting my son's wedding quilt. She enjoys sewing with me, so it was perfect! Above is the table with all of our strips neatly cut out and ready to 'rock and roll'.

Rachel thought that I HAD to take a picture of the back of the 4 patch. You unstitch 3 stitches and it opens to a very mini 4 patch, which allows you to iron everything so nicely flat. Better for piecing and quilting!

These are my star points, un-squared.

Squared!

The 3 sections that make up the 'star' square.

Getting the star points to match up to the diagonal line on the 'snowball' square (doesn't look like a snowball to me, but that's what they call it), was quite a process.

Rachel wanted me to post pictures that showed how we did it. First, we measured down 1/4 inch and marked it with pencil.
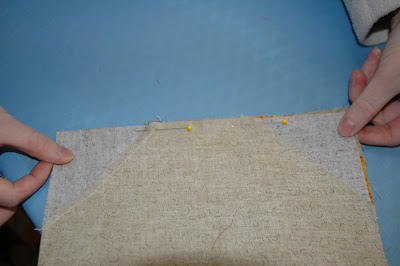
We poked the pins through to match things up, harder than you would think because it was off centered about 1/16 of an inch (or so), then pinned it horizontally, pulled the fabric to make sure the points matched, then put in 3 pins to anchor the fabric so it wouldn't move. It's not hard for fabric to slip 1/16 of an inch, or more. This method was the one that worked after much unpicking and frustration.

Christmas afternoon, we had finally gotten all of the squares matched and put together. I love how this looks like a circular quilt, but it is put together with squares and triangles!

I was able to get it on the machine for quilting. You can see my chalk lines here, but they brush off pretty easily. I DON'T have a computerized machine, so everything is free hand. This border I chalked to help me out.

The center of the 'snowball' I followed a pattern with my laser light.

The 'star' is a stitch in the ditch, then little free hand 4 petals in the 4 patches.
This is my most favorite pattern that I've pieced. It's called the Tennessee Waltz. It took 10 hours to quilt with all the detail. It is a queen size quilt 87" x 105". My husband has ordered one for us! It has been so much fun to put together. I'll post a picture of it on the bed when I get it bound!


